
How to read Guitar Tabs
A beginner-friendly guide to reading guitar tabs: the six strings, the numbers and lines, and the symbols for hammer-ons, pull-offs, slides, bends, palm muting, harmonics and more. Learn how to read chords in a tab, and how to give your playing solid timing.
Fri Nov 03 2023
~ Tanay Toshniwal
Guitar Tutorials
Guitar Tabs
How to read Guitar Tabs?

Unlocking the World of Guitar Tabs: A Beginner's Guide
If you've just started your journey with the guitar, you may have come across the term "guitar tabs." But what exactly are they, and how can you read and understand them? This guide is here to help you unravel the mysteries of guitar tabs, step by step.
"Guitar tabs" is a popular method used to notate music for the guitar. We also have a Guitar Tabs Generator that we use in our tutorials. Here are the basic steps to read guitar tabs:
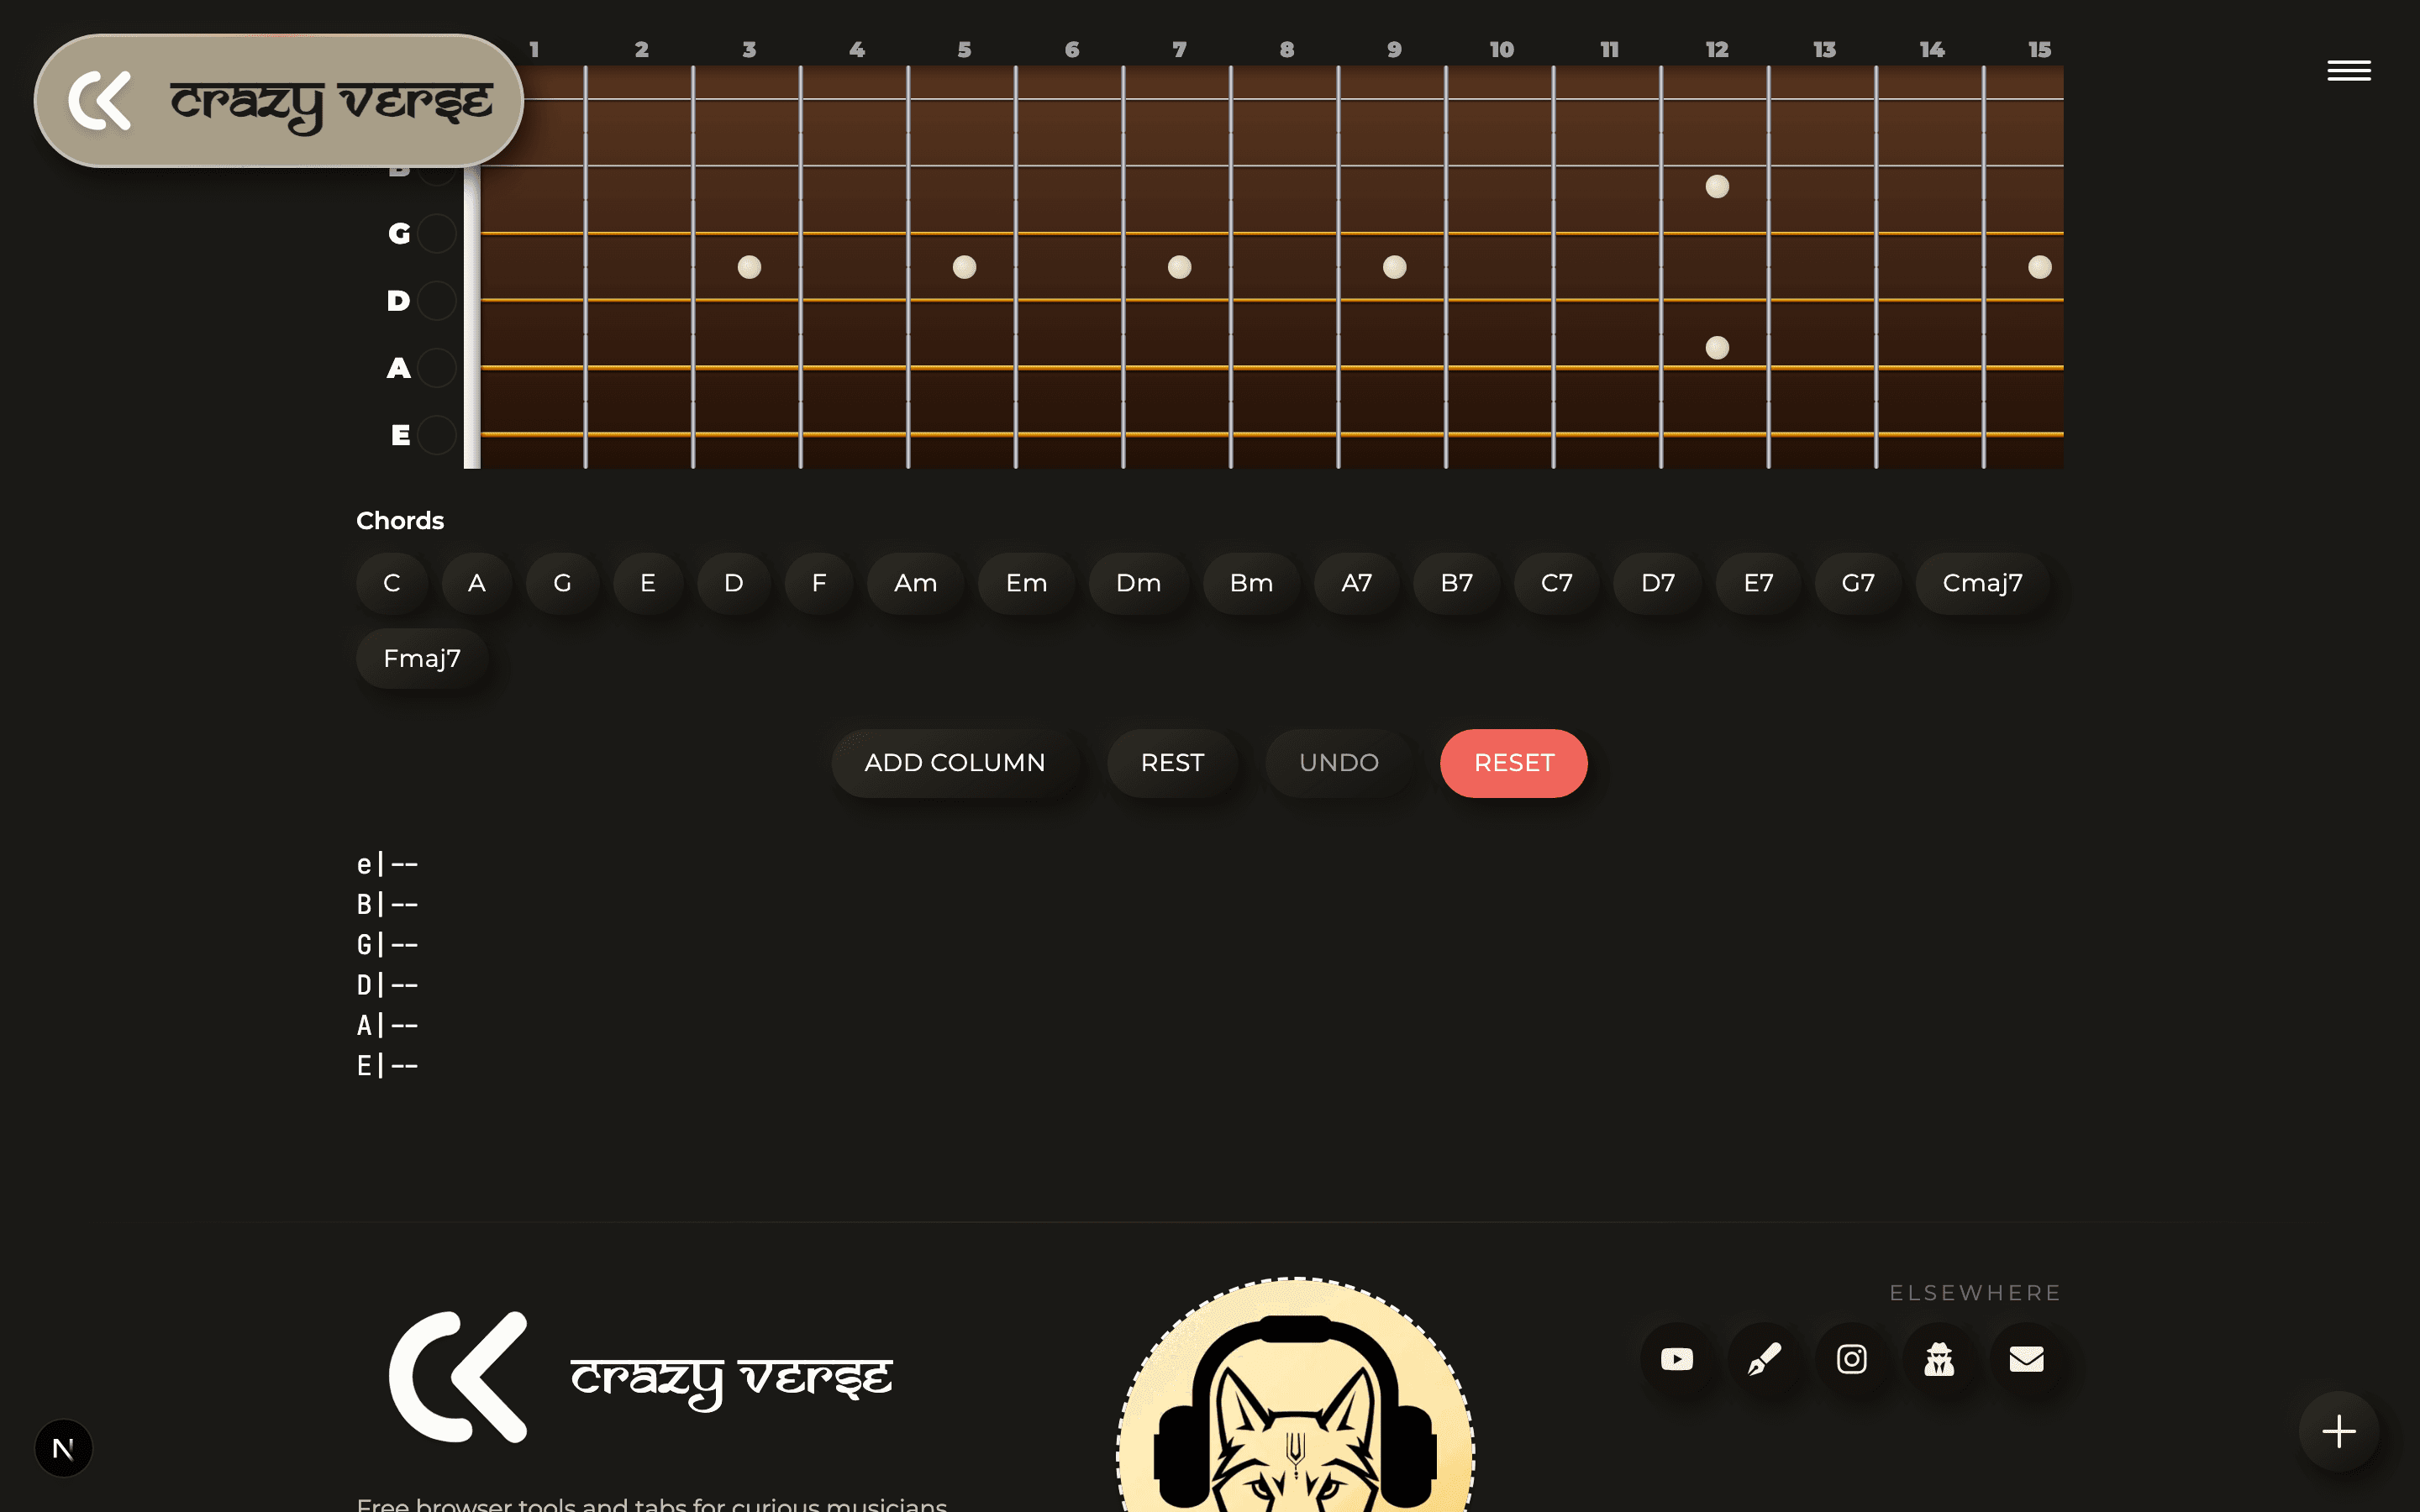
Before we get into the numbers, it helps to picture the strings. Here is the fretboard from our Tabs Generator. The six rails down the left side, labelled e, B, G, D, A and E from top to bottom, are your six strings, laid out exactly the way a tab lines them up.

-
Get to Know Your Strings: Before you can dive into the world of guitar tabs, it's essential to acquaint yourself with the six strings on your guitar. Let's start from the thinnest string to the thickest:
- High E (e): This is the thinnest string, often represented as "e" in lowercase.
- B: The second string from the top.
- G: The third string from the top.
- D: Moving further down the strings, you'll find the fourth string.
- A: The fifth string.
- Low E (E): Finally, the thickest string, usually represented as "E" in uppercase.
It's important to note that there are two "E" strings, but their positions and sounds are distinct. "High E" is the thinner one, and "Low E" is the thicker one.
-
Deciphering the Numbers: Guitar tabs are essentially a visual representation of music made specifically for the guitar. To read them, you'll need to understand the numbers that populate the lines. Each number tells you which fret to press down on, and on which string to do so. For instance, if you see a "3" on the "A" string, this means you should press down on the third fret of the "A" string with one of your fingers.
-
Recognizing the "horizontal" lines: In a guitar tab, the lines represent the strings of the guitar. There are six lines, just like there are six strings. The top line corresponds to the high E string, and the bottom line represents the low E string. The lines in between represent the other strings in ascending order.
-
Mastering Additional Symbols: Apart from numbers, guitar tabs may include various symbols that communicate specific techniques to be applied while playing. Here are a few common symbols and what they mean:
- Hammer-on (e.g., 2h4): A hammer-on instructs you to play the second fret on a string and then, without picking the string again, tap your finger down on the fourth fret. This creates a smooth, connected sound.
- Pull-off (e.g., 4p2): A pull-off is the opposite of a hammer-on. It means you pluck the string while pressing down on the fourth fret and then, without picking the string again, lift your finger to allow the sound of the second fret to be heard.
- Slide (e.g., 2/4 or 4\2): Slides are indicated by a forward slash (/) or backward slash (\) between two numbers. To slide, start playing the note at the first fret number and smoothly glide your finger up (for /) or down (for \) to the second fret number. This creates a seamless transition between the two notes.
Note: There are more symbols beyond these three, and we will get to them a little further down, but hammer-ons, pull-offs, and slides are the ones to learn first.
-
Understanding Rhythm: Guitar tabs are excellent for showing which notes to play, but they often lack information about rhythm and timing. In such cases, it's beneficial to listen to the song or refer to sheet music with rhythm notation. Remember that the notes in a tab are laid out from left to right along the x-axis, representing a musical timeline.
Keep in mind that while guitar tabs are a fantastic way to quickly learn how to play your favorite songs, they may not capture all the nuances and subtleties of the music.
A fuller symbol cheat sheet
Earlier I said there were more symbols worth knowing, so here is a fuller cheat sheet you can come back to. Do not try to swallow all of it at once. Just glance at it now so you recognise these when they show up in a tab, and let them sink in as you run into real songs.
| Symbol | Name | What it tells you |
|---|---|---|
b | Bend | Play the note, then push the string up so the pitch rises. 7b9 means bend the 7th fret until it sounds like the 9th. |
r | Release | Let a bend fall back to its starting pitch, often written straight after a bend, like 7b9r7. |
~ | Vibrato | Wobble the note by bending it up and down quickly for a singing, sustained sound. |
PM | Palm mute | Rest the edge of your picking hand on the strings near the bridge for a tight, muted chug. Usually written above the numbers. |
x | Dead note | A muted, percussive click with no real pitch. The backbone of a lot of funk and rhythm parts. |
( ) | Ghost note | A note played softly, almost thrown away, written in parentheses. |
<12> | Natural harmonic | Touch the string lightly right over the fret wire instead of pressing down, for a bell-like chime. Most common over the 5th, 7th, and 12th frets. |
P.H. | Pinch harmonic | A squealing harmonic you catch with the pick and thumb together. Very common in rock and metal leads. |
t | Tap | Tap the fret with a picking-hand finger instead of picking it, usually to reach notes far above your fretting hand. |
let ring | Let ring | Keep the notes ringing into each other instead of stopping them, like holding down a chord. |
/// | Tremolo picking | Pick the same note rapidly and continuously. |
One thing to know: tabs are not perfectly standardised. Different sites and transcribers write these in slightly different ways, so you will see small variations. When a symbol looks unfamiliar, the feel of the song usually makes its meaning clear.
Reading chords in a tab
So far we have mostly talked about single notes played one after another. Chords work a little differently. When numbers are stacked vertically, lined up in the same column, you strum or pick those strings together as a chord. When numbers are spread out left to right, you play them one at a time, in that order.
That single rule, vertical means together and horizontal means in sequence, is enough to read most rhythm parts. An arpeggiated chord, where you pick the notes of a chord one by one instead of strumming, shows up as a little staircase of numbers climbing across the strings.
If you would rather not place a chord one note at a time, the Tabs Generator has a palette of common chords ready to drop straight in, from open shapes like C, A, G, E and D to sevenths like A7 and Cmaj7:

Getting your timing right
Here is the one real blind spot of tabs: they show you which notes to play, but not the rhythm. A tab will happily let you play a run twice as fast or twice as slow as the record without complaining. That is why I always pair a fresh tab with a metronome.
Learn the notes first, slowly, then bring them up to speed against a steady click. I wrote a full walkthrough in my guide to the metronome, including a slow-to-fast routine that works especially well for the tricky runs that a tab makes look deceptively simple.
Connecting tabs to theory
Once you can play a part, the natural next question is why it sounds the way it does. Tabs are shapes and positions, but underneath those shapes are scales and chords. If you drop the notes of a lick into the Music Theory Visualizer, you can see which scale they come from and which chords they sit over.
That is how a pile of memorised shapes slowly turns into real understanding, and how you start writing your own lines instead of only copying other people's. If theory has always felt abstract to you, seeing it light up right next to the tab you are learning is the fastest way I know to make it click.
Try it in the Tabs Generator
Reading tabs starts to click a lot faster once you have written a few of your own. That is exactly what our Guitar Tabs Generator is for. You get the full fretboard and the chord palette from above: click frets or pick a chord, press Add Column to lay each one down, and it writes clean tab for you as you go.
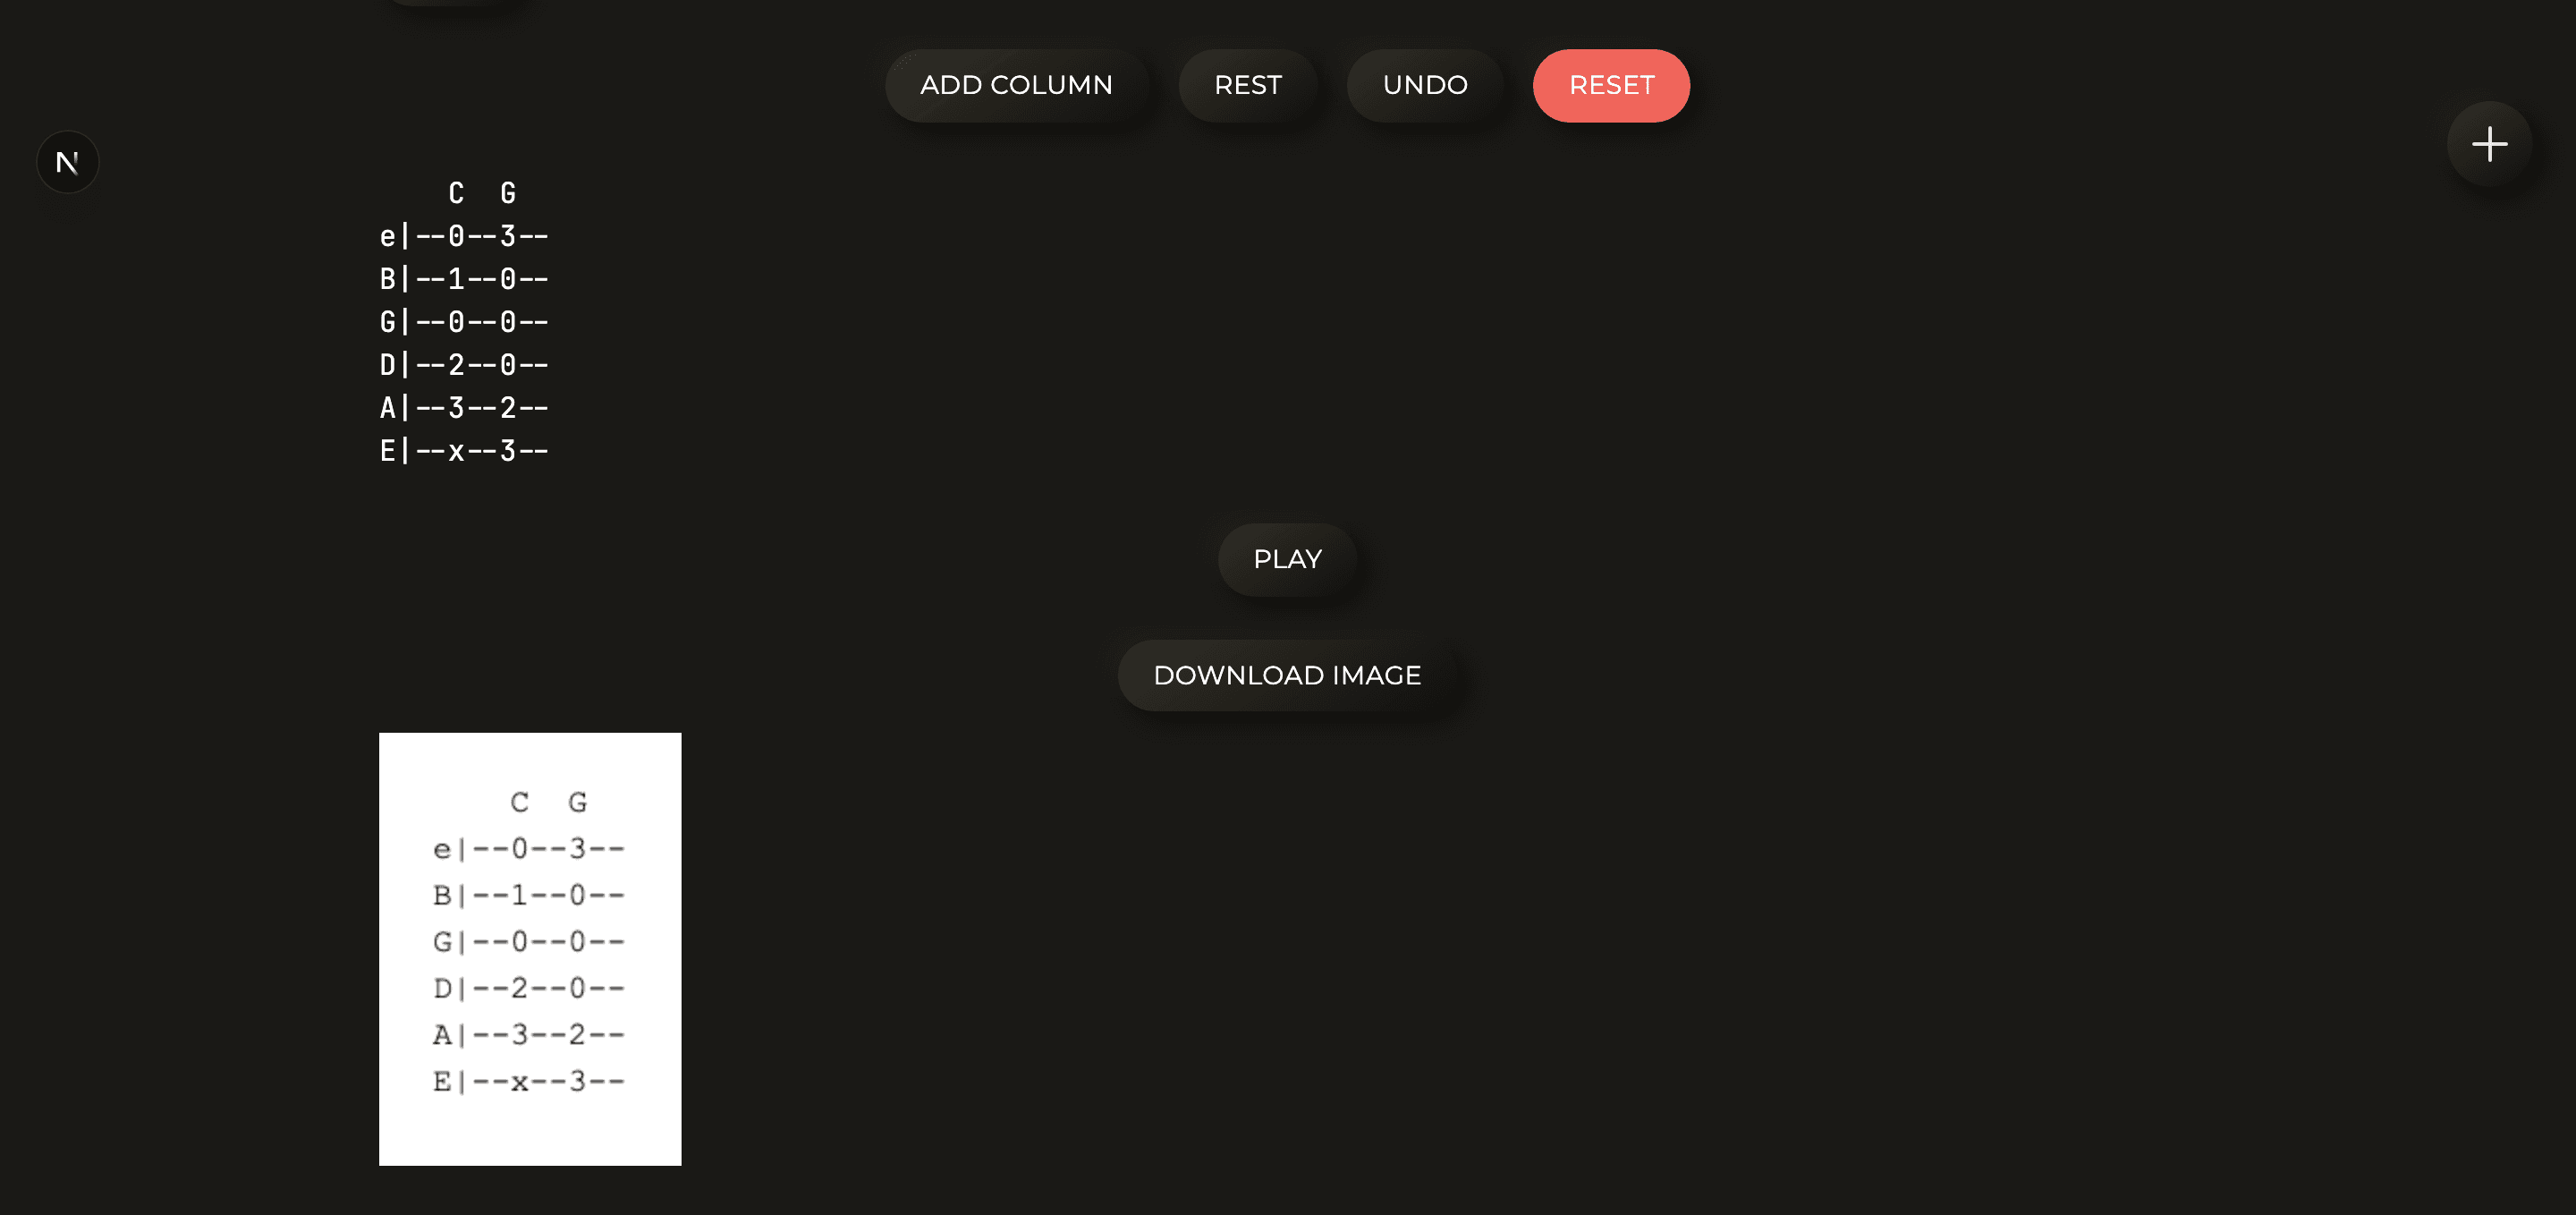
Once you have a few columns down, you get a live text preview of the tab, a Play button to hear it back, and a Download Image button to save it as a picture you can share or return to later. Here it is with a couple of C and G chords added:
It is the same tool I use to build the tabs in these tutorials, so anything you read about here, you can go and try for yourself right away.
Further Resources
To complement your learning journey, I've created a series of instructional videos on my Youtube Channel, where I walk you through the process of playing specific songs using guitar tabs.
(Kindly be aware that continuously sharing new video tutorials will be a perpetual effort, given my simultaneous commitment to a full-time role as a software developer. Despite my busy schedule, I am dedicated to providing valuable resources to aid you in your guitar journey.)
If you have any questions, don't hesitate to reach out to me via email or through my social media channels.
Don't forget to LIKE - SHARE - SUBSCRIBE to my Youtube Channel to stay updated with my latest tutorials and follow me on social media for regular musical insights!
Peace ✌️